The Great Mural Project-Sky and the Ocean
Thursday, April 28th, 2011The basic elements to my mural were going to be the ocean and the sky. These had to define the space, the horizon line and needed to be visually interesting in it’s own right.
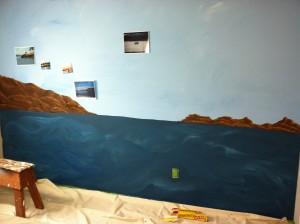
The first question was, where do I put the horizon line? I treated this piece as a huge piece of artwork so I needed to be conscious of the horizon line and visual flow, but still have fun. I didn’t want to split the wall evenly but I did have a long list of creatures I wanted to paint in the ocean. I opted for slightly lower than halfway. I believed that this would be more visually interesting and still leave enough room for sea creatures. It turns out I had more than enough room for the creatures but that’s because I couldn’t bend over enough with the preggo belly to paint the ocean floor.
When contemplating how to paint the ocean using house paint, I opted to go for a raw sort of look. I wanted variety in the colors but I also thought that it was critical to create a feel of movement in the ocean. The ocean is never still, it’s always moving and it breathes. I opted to go with the raw unmixed and unblended colors and just swoosh them all together. I’ve had great luck with how paint will blend on it’s own and if it’s all wet paint you can create a very active but interesting visual. In the ocean you can definitely see specific brush strokes (sorry Art Professors in college, you can tell what size brush I used!). I believe that this creates a lot of movement and action in the ocean. To create variety in the colors I used three colors of blue for the ocean and one foresty green color and didn’t mix them up. This means that there are swaths of different colors swooping throughout the ocean. I opted to go with the raw unmixed and unblended colors and just swoosh them all together. I’ve had great luck with how paint will blend on it’s own and if it’s all wet paint you can create a very active but interesting visual.
For both of these sections I used a large 4in brush and painted rapidly. In the ocean area you can see how my raw blending of colors in the paint tray made for a visible brush stroke and lots of good movement.
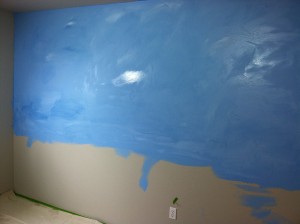
Lessons Learned: For these sections I’d recommend painting the areas quickly and in vertical swathes. I wanted horizontal movement of the ocean but the reality is that the house paint dries just fast enough that you need to paint the horizontal movement in vertical stripes. Otherwise it just won’t look right. Also, be careful what order you paint in. I’d recommend painting the sky first and the ocean second… otherwise potential drippage can cause angst and do-overs.
I did something similar but simpler for the sky. I just added in a little bit of white to the sky blue.. ok and a tiny bit of darker blue. It turns out that it looks like wispy clouds in the daytime sky. There is no need to mix it together just dump a bit of white into the color and roll with it. I didn’t feel the need to have such an active visual for the sky and wanted to keep it simpler.


